

Share:
Nov. 11, 2026
With Ejon Flying, you can turn rough, sharp acrylic sign-panel edges into consistent, production-ready finishes by following a simple workflow: inspect the cut, select an acrylic-compatible abrasive, set up a controlled sanding pass, and verify every panel. This guide explains How Sanding Deburring Machines Help in Acrylic Sign Panel Finishing, including practical checks that help reduce rework without overheating or scratching the material.
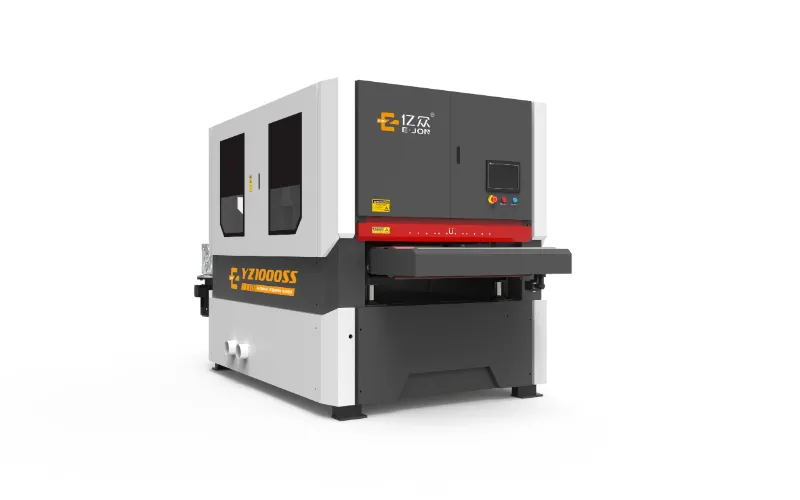
Laser cutting, routing, and sawing can leave burrs, sharp corners, chips, or uneven edge profiles. These defects can affect sign appearance, handling safety, adhesive bonding, and fit during assembly. A properly configured Sanding Deburring Machine helps standardize edge preparation across batches and reduces reliance on inconsistent hand sanding.
How Sanding Deburring Machines Help in Acrylic Sign Panel Finishing depends on the required final appearance. Mechanical sanding can remove burrs and smooth an edge, but it does not automatically create an optically clear, polished edge. Transparent panels may need an additional polishing process, while a satin or matte edge may be the specified finish.
Results depend on panel thickness, cut quality, abrasive type, machine configuration, and the finish specification. Confirm that the machine’s abrasive head, contact pressure, and workholding are suitable for PMMA (acrylic) before production.
Identify whether the panel was laser-cut, routed, or sawn. Check for melt marks, chips, saw marks, burrs, and dimensional variation. Record the required edge appearance—such as deburred, matte, satin, or polished—on the job traveler. Do not assume that one sanding sequence suits every acrylic grade or sign design.
Start with a test piece from the same material and cutting process. For light burr removal, a fine abrasive or suitable nonwoven abrasive may be enough. Where visible tool marks remain, use a staged progression rather than jumping directly to a very fine grade. As a trial range, operators often evaluate approximately 180–240 grit for initial correction and 320–600 grit for refinement; validate the result on the actual acrylic and abrasive system before setting production instructions.
A coarse abrasive can remove material quickly but may leave deep scratches. An overly aggressive brush or excessive pressure can chip an edge or generate heat. Use only abrasives and contact tools approved by the machine and abrasive manufacturers for acrylic.
Clean the support surface and workholding, then set the machine according to its manual. Keep the panel flat and supported so vibration does not produce waviness. Begin with a conservative feed and contact pressure, and avoid holding one area against the abrasive for too long. Acrylic can soften from frictional heat, so watch for smearing, whitening, or a glossy melted line.
Use effective dust extraction designed for the material and follow your site’s dust and fire-safety procedures. Do not use a cleaning solvent or coolant unless the acrylic and equipment suppliers confirm compatibility; some chemicals can cause crazing or stress cracking.
Process one sample panel, then inspect the full edge under consistent lighting. Check that burrs are removed, the edge break is uniform, and there are no new chips, deep scratches, or heat marks. Adjust one variable at a time—abrasive grade, feed, pressure, or number of passes—so the cause of any change is clear. Record the approved settings for repeat jobs.
For a smooth mechanical edge, progress through the validated abrasive sequence and remove sanding residue between stages. If the drawing calls for optical clarity, treat sanding as edge preparation only and follow with a compatible polishing method. Confirm that the polishing process will not distort the panel, damage masking, or affect nearby printed graphics.
Use a 100% visual inspection for burrs, chips, scratches, and inconsistent edge appearance when the application or customer specification calls for it. For dimensional checks, use an appropriate calibrated instrument. A caliper with 0.01 mm display resolution can help monitor dimensions where needed, but display resolution is not the same as measurement accuracy or guaranteed machine precision. Set acceptance limits from the drawing and verify them with a suitable measurement method.
For material and optical requirements, ASTM D4802 is a relevant specification for acrylic sheet, while ASTM D1003 addresses haze and luminous transmittance of transparent plastics. These standards do not define one universal acceptable edge finish; agree on edge appearance, dimensions, and inspection conditions with the customer. Where surface texture is specified, use the applicable ISO 21920 series and the agreed measurement method.
In a sign-production workflow, a Sanding Deburring Machine can make edge preparation more repeatable than hand-only finishing, especially when operators process panels of similar thickness and geometry. The practical benefit is fewer sharp edges and less variation between pieces—not a guarantee that every panel will be defect-free without setup and inspection.
| Production issue | Machine-assisted response | What to verify |
|---|---|---|
| Sharp burrs after routing | Use a controlled deburring pass with an acrylic-compatible abrasive | No remaining raised edge or excessive edge rounding |
| Uneven hand-sanded edges | Standardize workholding, feed, and abrasive sequence | Consistent appearance across the batch |
| Scratches or cloudy areas | Review abrasive condition, cleanliness, and process sequence | Surface condition under consistent lighting |
| Heat marks or smearing | Reduce dwell and pressure, check feed, and confirm tool suitability | No melted or distorted edge |
When evaluating equipment from Ejon Flying, provide the panel dimensions, acrylic type, cut method, target edge finish, and expected throughput. Ask the supplier to confirm tooling compatibility and arrange a sample trial. You can also agree on a practical service-response target, such as a 24-hour initial reply, rather than assuming a response time that has not been confirmed.
To put this process into action, define the edge finish, trial an acrylic-compatible abrasive, set conservative machine conditions, approve a first piece, and document inspection criteria. Then train operators to check for burrs, chips, scratches, and heat marks on every panel when required by the job specification. These steps help businesses improve repeatability, reduce avoidable rework, and deliver sign panels that are safer to handle and closer to the customer’s visual requirements.
Ejon Flying can help you assess a suitable Sanding Deburring Machine configuration for your acrylic sign-panel workflow. Share your material, cut method, finish target, and production volume so the process can be evaluated against your real operating needs.
Hot Products

Equipped with full servo control system to ensure the accuracy and stability of feeding, slotting, and bending function.

Manipulator alternately feeding structure, the material clamps are casted which can avoid scratching the matenial, mean while improving the feeding holding.

Productive: Cutting, Notching, Flanging, Bending & Shearing. All the functionl will short the letter making time.

Adaptable: can process all kinds of materials used in making sign letters, such as stainless steel, galvanized steel, flat aluminum, profile aluinum and channelume.

EJON Sanding-Deburring Machine-YZ1000G
Application: remove solid slag and burrs on the surface of workpiece; remove rust and oxide layer on the surface of the workpiece; Round the internal and external contours at the edge of metal sheet.

EJON Sanding-Deburring Machine-YZ1000S
Application: remove solid slag and burrs on the surface of workpiece; remove rust and oxide layer on the surface of the workpiece; Round the internal and external contours at the edge of metal sheet.

EJON Sanding-Deburring Machine-YZ1000SS
Supporting laser cutting machine, CNC stamping, various CNC processing or other machining deburring front production line.

EJON Sanding-Deburring Machine
Supporting laser cutting machine, CNC stamping, various CNC processing or other machining deburring front production line.

Industries: metal cutting, electrical switch manufacturing, aerospace, food machinery, textile machinery, engineering machinery, locomotive manufacturing Agriculture and forestry machinery

Laser Welding Machine-300watt/500watt
YAG laser transmission welding, 5 meter fiber optic tube, high temperature resistance handheld laser welding handheld.
